Showing posts with label Crafts & DIY. Show all posts

DIY Button Push Pins

Sunday, 7 June 2015

Push pins are something I use a lot - espeically at my new job - but they are so ugly!!

Make them pretty with this quick DIY :)

You will need:
Your buttons of choice
Push pins
Glue gun
Cork board


Start off with the plain pins and push them into the board. Use a dot of glue on each and pop your button on.

Make sure you press firmly - but don't burn yourself!


Leave to dry for about 10 minutes and done!

Don't they look cute!?


Old Candle Jars and Wax Melt Recyclable!

Tuesday, 2 June 2015

Ohhh you will be thankful for pinning this later!

Ever buy a candle in the most gorgeous jar and don't want to throw it away after the candle has burned out? Now you don't have to!

I keep them all. Literally - all! I use them for coffee, sugar, pasta, buttons, you name it!!

Now, what about when you finish a gorgeous smelling candle - it breaks your heart a little, right? Here is how to use ever last ounce of the wax to keep that gorgeous smell going a little longer.

Below was my favourite candle. I didn't even like to leave it burning for too long as I love the smell so much. Then it ran out.

Here is how to keep the jar AND reuse the wax.

You will need:
Your old burned out candle
Pippet
Silicone mould
Kettle and water
Kitchen roll


Put your empty jars on kitchen roll - now seriously guys, this is the important bit because you might get burned!

I would recommend that you do this in a bowl of some kind, that can take the heat. In the unlikely event of the glass cracking, you do not want to be covered in boiling water AND melted wax.

Stand your jars appropriately and pour boiling water in the jar, all the way to the top. Do this slowly and listen - if the glass makes any noise, stop and bin it.


After about 10 minutes, the wax will have all floated to the top. Grab your pipette.


Gently use the pipette to suck up the melted wax - be careful not to get any water in the pipette.


Pipette the wax into your silicone mould. Leave to dry. Now this doesn't look too pretty - but the end result is, I promise :) 


When they are dry, pop them out and they are ready to use as wax melts!


Cute huh?!

Leave the jars to cool overnight - when they are cooled and the wax is solid, pop it out.


The wax disc can also be used as a wax melt - it just isn't as pretty! 


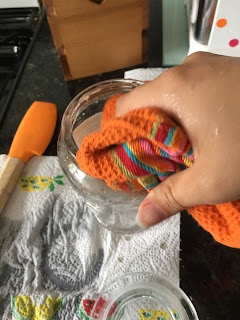
Make sure the glass jar is cleaned and tadaaaa! 


What would you use yours for?

DIY Glasses - Tried and Tested!

Monday, 23 February 2015

Being the Pinterest addict that I am, I have seen many different DIY projects that I will eventually work my way through!

One that really interested me is using nail varnish to personalise glasses! The walk through that I originally found said that they are dishwasher proof and very durable - got to be worth a try, right?

At my last trip to one of the various pound shops, I picked up a set of 6 stacker glasses for (you guessed it) £1! One did get broken when I tried to save a spider.. So I have 5 to work with.


I picked out 6 5 nail varnishes that I liked the colours of and some cotton buds.


With my first colour, I dipped the cotton in the nail varnish and splodged it all over the glass in some sort of pattern.


It was very therapeutic and had minimal mess. The only thing that got covered in nail varnish that wasn't the glass was my hands!


I did the splodges in sections I didn't get covered!

This was the end result - I am happy!


I also tried this with shot glasses - I painted the bottoms of each glass - how cool does this look!?


So tried and tested - total success! Definitely not dishwasher safe though.. I tried it and the dishwasher removed half of the dots. I tested scrubbing with a sponge and hot water and the dots don't budge :)

HAND WASH ONLY!